

CLS EVO is the new automatic chain lubricator that obeys your every word! No more grease sprays, and no more stress of lubrication! What’s more, your bike stays clean. Nova Moto is the exclusive distributor for France and French-speaking countries since January 2016, after 4 months of testing (assembly and riding on Z750 and ZZR1400). To help you during the assembly, Nova Moto has prepared this CLS EVO assembly tutorial for you!
It’s not very complicated, a little care and dexterity …and patience are required. With the help of this tutorial, you will be able to do this assembly quickly and safely. The detailed documentation that comes with your CLS EVO chain lubricator also deserves your full attention, it is much more extensive than this article. The CLS EVO automatic chain lubricator is universal for all motorcycles, however, for an even finest adaptation, you will also find special kits for BMW, Ducati, KTM and Triumph at Nova Moto Le Shop.
Ready to go?
To achieve an optimal assembly, it is necessary to work in good conditions. Make sure you have enough room to move around the bike. If you have a centre stand or a pit stand, use it.
To begin with, locate all the parts and accessories supplied in the kit:
– The oil tank and its support
– The electronic box
– The pump
– The hose, the lubrication nozzle and the square rubber guides
– The black sleeve (to make the installation invisible ☺)
– Double-sided Velcro to fix the regulator
– The regulator
– Miscellaneous fixing accessories (handlebar holder, clamps)
– The lubricating oil canister
– Spare fuses
Efficient and practical installation begins with thoughtful and meticulous installation.
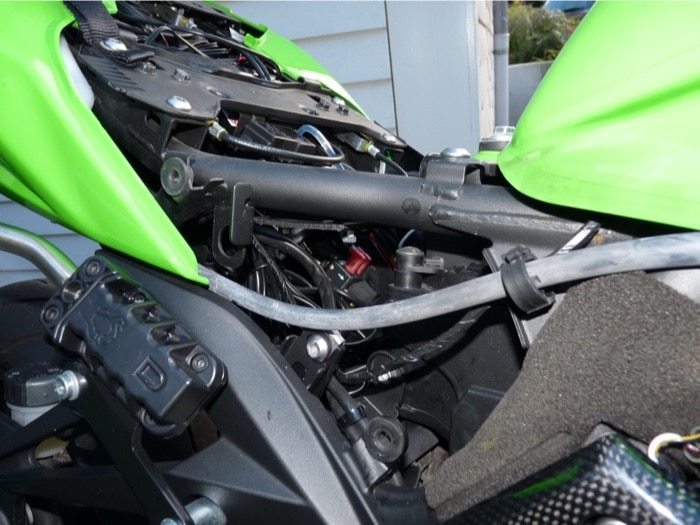
1. Determine the different locations where you will position:
– the oil tank (it must remain accessible for filling, even if the reduced consumption allows you to drive 7000 km with « one full tank »)
– the pump – the electronic box (the ideal is to place these three accessories under the saddle, or in the side of the fairing)
– The regulator
2. Position freely (without fixing) these accessories in the chosen positions
3. Connect the electronic box to the battery
A quick reminder: Disconnect the negative pole first! The red wire (with the safety fuse) to the positive (+) terminal first, and the black wire on the negative (-) terminal second.
4. Secure the tank with its metal bracket.
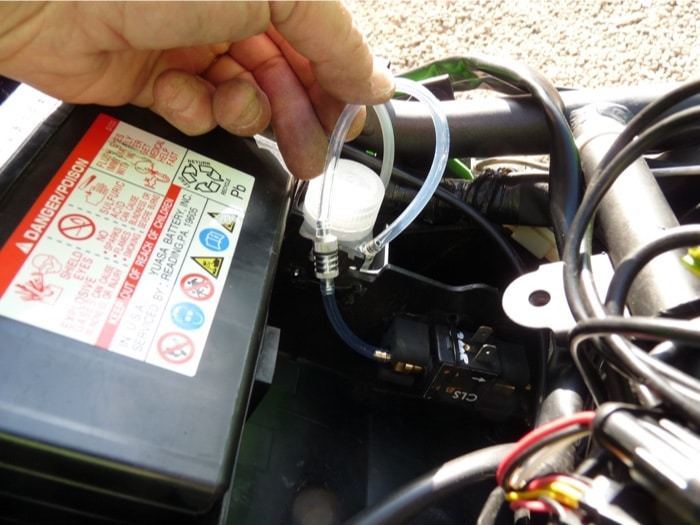
You can use the self-gripping Velcro tape (underneath and on top of the strap), clamps or let your imagination run wild. The venting hose is already in place installed (opaque hose). Connect the oil hose (translucent hose) to the hollow nut of the tank: hold this nut between thumb and index finger in order to not to deform the tank; the simplest method is to squeeze the hose by moving it from right to left. Caution: the venting hose must obviously be above the oil level.
5. Position the pump with the two notched rubbers and connect the tank hose to the metal filter
6. Fix the electronic controller in such a way as to be able to visualize the led, which will indicate by its flashing that the system is working
Tip: the box and the pump only work with the motor running. So don’t panic if your display remains black while you have the ignition. From experience, that’s what the preliminary tests of the products that Nova Moto offers you are meant for!
7. Connect the connectors (red, on black wire) which go from the box to the pump (there is no polarity)
8. Install the controller (switch or display) on the handlebars, if you want to adjust the flow rate setting easily (using the handlebar clamp and/or the scratch stickers), or under the saddle. The three-pin male cable is to be plugged and screwed onto the three-pin female cable of the electronic box.
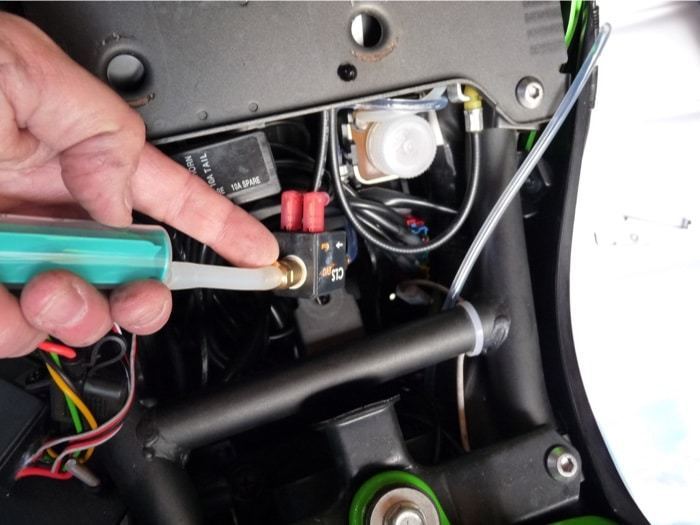
9. The pump must now be primed Fill the oil tank (half full is enough), connect the syringe to the nozzle at the pump outlet. Operate the syringe (suck in) until the oil reaches the syringe without air bubbles. Remove the syringe (a cloth positioned underneath avoids the small drop ☺).
You’ve finished installing the electronic part, well done!
Now let’s see how to position the pipe that will carry the oil to the chain…
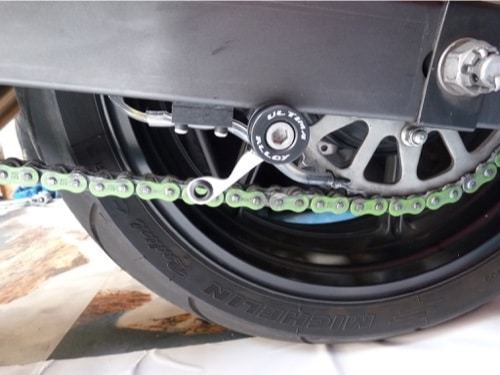
10. Route the clear tube from the pump to the transmission crown wheel. Choose a simple » path » that is easy and discreet. The ideal is to make this tubing arrive on the inner part of the swingarm (take advantage of the » cavity » around the shock absorber).
11. Once the location is chosen, remove the tube, thread the drilled rubber squares onto the tube and slide them over the tube. practically to the end, towards the lubrication nipple: they will allow you, once glued, to secure the pipe (prevent it from being damaged by rubbing the chain or moving. Reposition the line as you have defined it. You can use the black sleeve delivered with the kit to cover the hose so that it is discreet between the swing arm and the chain and under saddle, detail-oriented ☺ !
12. Degrease the swingarm where you want to glue the rubber guides. Now that your hands are dirty, clean the whole swingarm ☺, it will never be so dirty again with the CLS EVO chain lubricator! Need I add something? You’ve probably already done it: clean your chain, pinion, sprocket, etc. as well! With some disaromatized petrol and some old toothbrushes, it will be perfect ;)!
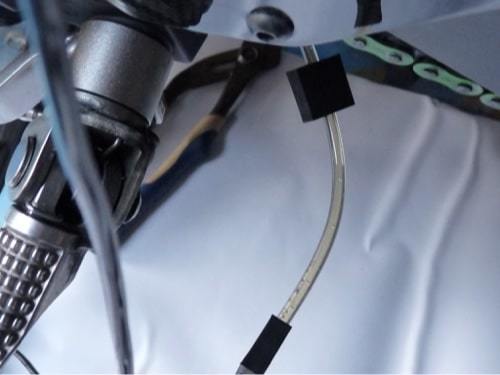
13. Stick one by one the rubbers with the super glue in order to guide the pipe on the swing arm. You can space them from 5 to 10 cm, depending on the needs related to the shape of the swing arm.
The pipe is now in place, firmly held on the swingarm by the glued rubbers. Note: the hose can still be slid in, the holes in the rubbers are quite large.
14. Now you have to prime this hose by replacing the air with oil. Take the syringe, connect it to the lubrication nozzle (at the end of the hose, with the metal rod that will be used as a guide), open the oil filler cap, top up and… suck in! Tip: remember to fill the tank as it empties! Once there are no more air bubbles in the hose, the system is ready for use (this may take up to 15 minutes, be patient).

15. Now you have to glue the rubber square on which the lubrication nozzle will be screwed.
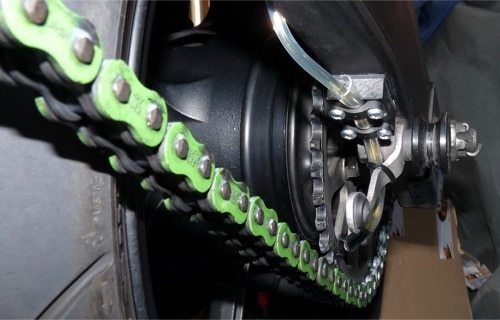
Tip: give the ideal bend to the hose (thanks to the metal stud) before screwing it on this square rubber, it will be more precise.
That’s it, you need about two hours for a complete assembly of the CLS EVO automatic chain lubricator, of course this time can vary depending on the aesthetic requirements of each person! The investment will be quickly forgotten when you experience that you will never have to grease your chain again, and the wheel rim can be cleaned with a simple wipe or paper towel!
How do you purchase the CLS range? From 2021, directly on CLS’ Website: cls-evo.de
Texts and photos: ![]() and Isabelle Maillet
and Isabelle Maillet
